
Stained glass cross crafts have always felt so special to me because they combine creativity with faith in such a beautiful way. There’s something about the way light shines through the colors that makes a simple cross come alive, almost like it’s telling its own story.
I’ve always loved projects that are meaningful but still easy enough for anyone to enjoy, and this one fits perfectly. Whether you’re making them with kids at Sunday school, creating decorations for Easter, or just wanting a quiet project to connect with your faith, these stained glass cross crafts are a wonderful choice.
They’re bright, uplifting, and carry a message of hope. Plus, you don’t need fancy supplies—just a little imagination and a few basic materials. I think what makes them extra special is how each one turns out unique, just like every person’s walk with God.
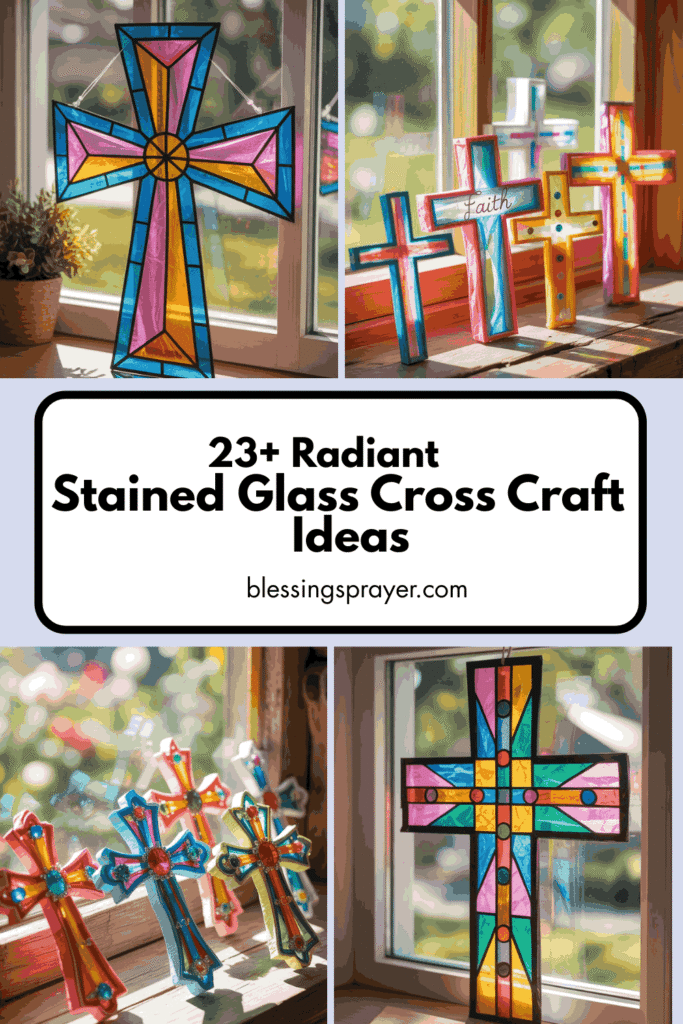
Stained Glass Cross Craft ideas
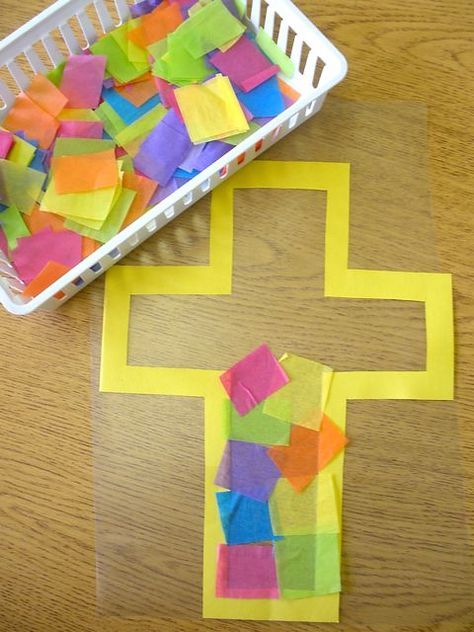
Tissue Paper Stained Glass Cross
Source: Pinterest
Honestly, this is one of the simplest and most beautiful ways to make a stained glass cross. All you need is contact paper, tissue paper, and a cross outline cut from cardstock. Kids or adults can tear the tissue into small pieces and arrange them however they like, almost like making a colorful mosaic. When sunlight passes through, the whole design glows in the most uplifting way. I’ve tried this project during Easter, and it always gets compliments. What makes it extra special is how no two crosses look the same—everyone’s piece carries their own personality and touch.
Fabric Collage Stained Glass Cross
Honestly, this is one of my favorite ways to combine texture and color. You can use scraps of colorful fabric instead of paper or tissue, gluing them onto a cardstock or canvas cross outline. The different textures and patterns make each cross feel truly unique, almost like a patchwork quilt. I’ve found this craft is perfect for older kids or adults who enjoy sewing or just love working with fabric. Once finished, you can hang it in a window or frame it. The sunlight filtering through thinner fabrics gives it a soft glow, making it feel like a real stained glass piece.
String Art Stained Glass Cross
This craft is both creative and surprisingly simple. Using a wooden board, nails, and colorful embroidery thread, you can create the shape of a cross and then fill in the sections with crisscrossing strings. Honestly, the result is stunning and gives a modern twist to the traditional stained glass look. It’s a great project for teens or adults, and the process is almost meditative. Plus, it makes a wonderful keepsake that can be displayed in any room, adding both faith and artistry to your home.
Foil Stained Glass Cross
Source: Pinterest
Using aluminum foil and markers is a fun, unconventional approach. Simply shape a cross from foil or use foil as the base, then color different sections with permanent markers to mimic stained glass. Honestly, I love this one because the metallic sheen reflects light beautifully, creating a glowing effect similar to real glass. This is especially great for kids who want something quick but still dramatic. Once done, hang it in a sunny spot or attach it to a greeting card for a shiny, personalized touch.
Popsicle Stick Stained Glass Cross
For a rustic and hands-on approach, use popsicle sticks to make the frame of a cross. Fill the empty sections with tissue paper, colored cellophane, or even wax paper. Honestly, this is such a fun project for kids or a Sunday school group because it combines building, coloring, and arranging all in one craft. The end result looks surprisingly polished, and the sticks give it a charming, homemade feel. It’s also sturdy enough to hang in a window or display on a shelf.
Beaded Wire Stained Glass Cross
This idea adds a touch of elegance and sparkle. Using craft wire, shape the outline of a cross, then thread colorful beads along the wire to create “panels” of color. Honestly, it’s a little more advanced, but the finished piece is delicate and beautiful. I’ve made a few myself as gifts, and the light catching the beads really mimics the stained glass effect. It’s perfect for older kids, teens, or adults who enjoy more detailed, hands-on crafts. The final result can be displayed in windows, on walls, or even as a unique ornament.
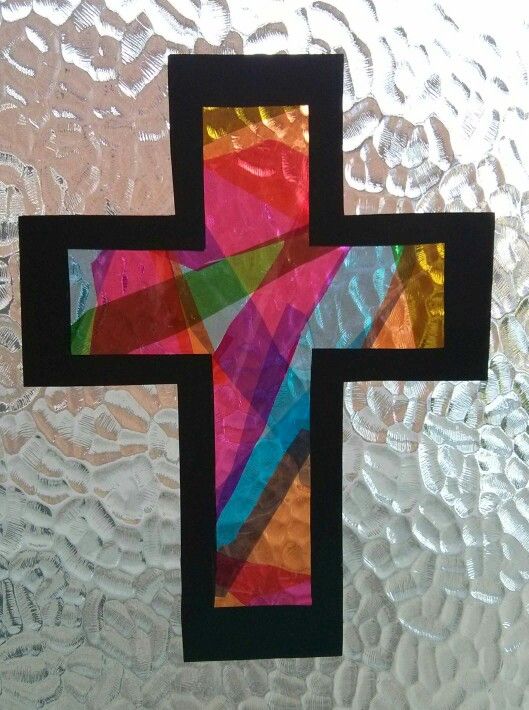
Cellophane Stained Glass Cross
Source: Pinterest
Using colored cellophane is a great way to create a stained glass look that’s bold and vibrant. Cut a cross frame out of black cardstock, then glue pieces of colored cellophane inside the empty spaces. Honestly, the shine and brightness from the cellophane make it look so close to real stained glass. When hung on a window, the light reflects beautifully through each piece, creating a cheerful and faith-filled decoration. I love how easy this is to prepare, and it’s also perfect for kids who like bold colors and less mess.
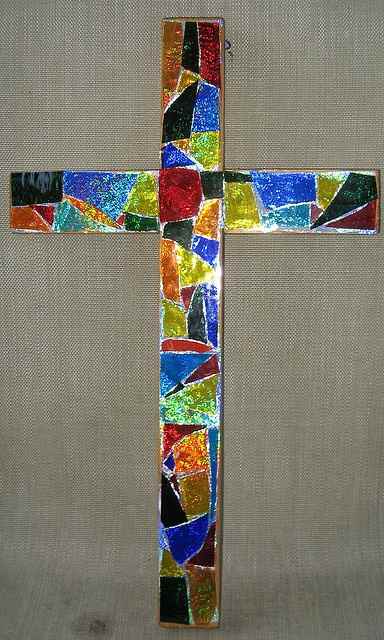
Cardstock Mosaic Cross
This project is all about patience and creativity. Start with a sturdy piece of cardstock in the shape of a cross, then cut out or punch small pieces of colored paper. Glue them down one by one to create a mosaic effect. Honestly, it takes some time, but the result is absolutely stunning. This is a craft I’ve done with older kids, and it gave them a chance to slow down, reflect, and really pour themselves into the work. It’s a great reminder that beauty often comes from patience and effort.
Wax Paper Stained Glass Cross
Source: Pinterest
This idea uses wax paper, crayon shavings, and a little bit of heat to make a truly unique stained glass effect. Lay crayon shavings between two sheets of wax paper, then carefully iron them together (with adult supervision). Once the colors melt, you can cut out a cross shape from the sheet. Honestly, this one feels magical because the melted wax blends into swirls of color that look almost like real stained glass. It’s fun, creative, and surprisingly easy once you get the hang of it.
Layered Paper Cross
This craft gives a stained glass illusion by layering different colored construction papers. Cut a cross out of black paper, then back it with strips or shapes of colored paper. Honestly, this one is quick and simple, but it creates such a bold and beautiful look. When placed on a window, the light still shines through the thinner paper, creating a glowing effect. This works especially well for younger kids who may not have the patience for cutting lots of tiny pieces but still want something colorful and fun.
Sun Catcher Cross with Beads
View this post on Instagram
If you love a little sparkle, this idea is perfect. Use clear plastic or a cookie-cutter mold shaped like a cross, then fill it with colorful beads and melt them in the oven to create a sun catcher. Honestly, the first time I tried this, I was amazed by how much it looked like glass. When hung in a window, it shines brilliantly as the sun hits it. It’s a bit more involved since it requires baking, but the results are truly worth the effort.
Tissue Collage Cross on Canvas
This project is a step up from the simple tissue paper craft. Instead of sticking the tissue to contact paper, glue it onto a canvas in the shape of a cross. Honestly, the finished look is more permanent and feels like a true piece of art. You can even seal it with a layer of Mod Podge to give it a glossy finish. I love this option because it’s something you can actually hang up long-term in your home or church, rather than just for a season.
Transparent Sheet Cross with Sharpies
Grab a clear plastic sheet and some Sharpie markers, and you’ve got yourself an easy stained glass effect. Trace a cross outline with a black marker, then fill the sections with bold colors. Honestly, Sharpies create such vibrant shades, and they hold up really well on plastic. This is a project that doesn’t require paint or glue, so it’s less messy but still really beautiful. It’s especially great for classrooms where time and cleanup can be a challenge.
Salt Dough Stained Glass Cross
View this post on Instagram
This one mixes crafting with baking. Make a batch of salt dough, then cut out a cross shape. Before baking, press small bits of colored beads or glass pebbles into the dough. Once baked and hardened, the beads create a stained glass effect when light shines through. Honestly, it’s such a clever way to combine two classic crafts. These crosses make wonderful keepsakes and can even be used as ornaments.
Stained Glass Cross Bookmark
For something smaller and more practical, try making a stained glass cross bookmark. Using lamination sheets or contact paper, sandwich colorful tissue pieces between two layers, then cut into bookmark-sized strips with a cross design at the top. Honestly, this is one of my favorite little crafts because it’s meaningful and useful. Plus, it makes a thoughtful gift for Bible study groups or Sunday school kids.
Glitter Glue Cross
Glitter glue might sound messy, but it can create a dazzling stained glass effect. Draw a cross outline on wax paper, then use glitter glue in different colors to fill in the spaces. Once dry, peel it off and place it on a window. Honestly, kids go crazy for this one because it sparkles so much in the sunlight. It’s not the neatest project, but the shine and joy it brings are worth every bit of cleanup.
Faux Glass Gem Cross
Using flat glass gems from the craft store, you can create a shimmering stained glass cross. Arrange the gems inside a cross-shaped frame, then glue them in place on a clear backing. Honestly, the way the gems catch the light is stunning, and it feels more like real glass art. I love this craft for older kids or adults who want a keepsake piece that looks polished and decorative.
Melted Crayon Cross
Similar to the wax paper method, this craft uses crayons but with a slightly different twist. Peel and grate crayons into small shavings, then place them inside a cross stencil between sheets of wax paper. Iron gently until they melt together into bright, blended colors. Honestly, it’s amazing to see the transformation from tiny shavings into a glowing piece of art. Each one comes out different, which makes the project feel personal and one-of-a-kind.
Stained Glass Cross Ornament
For a smaller keepsake, try making stained glass cross ornaments. Using shrink plastic or clear acrylic, draw and color a cross design with permanent markers or paint pens. Bake if necessary to shrink, or leave as is. Honestly, these ornaments look beautiful hung on Easter trees, Christmas trees, or even in sunny windows. They make heartfelt gifts and can last for years if handled with care.
Layered Transparency Cross
This idea uses multiple layers of clear plastic sheets to create depth. Draw sections of a cross on different sheets, color them in, and then stack them slightly offset to give a three-dimensional stained glass look. Honestly, this project feels very creative and looks stunning when framed. It’s a little more advanced, but the layered effect is truly worth the effort.
Stained Glass Cross Card
A handmade card with a stained glass cross design is a wonderful way to combine faith and creativity. Cut out a cross-shaped window on the front of the card, then back it with tissue or vellum to mimic stained glass. Honestly, these cards feel so personal and heartfelt. They’re perfect for Easter, baptisms, confirmations, or even as a simple encouragement card. I’ve made a few myself, and the reactions have always been so warm and appreciative.
Painted Plastic Sheet Cross
A fun idea is using a clear plastic sheet or transparency paper as the base for your stained glass cross. Honestly, this one feels more like painting a real stained glass piece, but without the heavy work of cutting glass. You can trace a cross outline with black paint or marker, then fill the sections with vibrant glass paints or even watered-down acrylics. The finished product looks striking when taped to a window or framed on a wall. I’ve done this with teens, and they loved how “grown-up” their crosses looked. It’s a great project for anyone wanting a polished finish.
Coffee Filter Stained Glass Cross
This idea is simple yet surprisingly gorgeous. You start with a coffee filter, flatten it out, and then cut it into the shape of a cross. Using markers, kids color the entire surface with bold, bright shades. Next comes the fun part—spraying lightly with water to let the colors bleed together like stained glass. Honestly, watching the ink spread across the filter feels magical. Once it dries, it’s light enough to hang on a window, where the sun makes the colors dance. This craft works well for Sunday school or even as a quick Easter morning activity at home.
Watercolor Paper Cross
For those who enjoy painting, a watercolor stained glass cross is a lovely option. You can draw a cross outline on watercolor paper, then divide the inside into sections with black marker to mimic stained glass panels. Using bright watercolors, fill in each section with a different shade. Honestly, the way watercolors blend gives it such a soft, heavenly feel. Once it’s dry, the cross can be framed, turned into a greeting card, or even displayed on a church bulletin board. What I love most about this idea is that it feels personal and artistic, yet still very simple.
Window Cling Stained Glass Cross
This one is a little different but so much fun. With clear glue and food coloring, you can actually make your own stained glass window cling. Draw a cross outline on wax paper, then carefully fill in the sections with your tinted glue mixture. Once it dries, peel it off and stick it right to a window. Honestly, it looks amazing when the sun shines through—it almost feels like real stained glass. It’s messier than some of the other crafts, but the results are worth it. This is especially fun for older kids and teens who want something unique.
FAQ
What materials do I need?
Honestly, it depends on the craft style you choose. Gorgeous options include tissue paper, contact paper, cardstock, watercolors, acrylic paints, colored cellophane, glue, wax paper, beads, or wire for more intricate designs. Simpler versions work beautifully for kids, while adults can explore paints, plastic sheets, or wirework for a polished, radiant effect.
Can kids make these crafts?
Absolutely! Many of these ideas are perfect for kids, like vibrant tissue paper or coffee filter crosses. Younger children may need a little guidance with cutting or gluing, but they’ll love arranging colors and creating their own whimsical designs. Honestly, the joy on their faces is priceless.
How can I display my cross?
Most stained glass crosses look magical when taped to a sunny window or framed. Lightweight versions can hang with tape or string, while heavier wire or beaded crosses shine beautifully on a hook or stand. Honestly, seeing sunlight filter through the colors creates a truly charming glow.
Are these crafts safe?
Yes, but honestly, supervision is important with scissors, hot glue, or heat-based projects like melted crayons or wax. For younger children, stick to safe, non-toxic materials like tissue paper, markers, or washable paints. This ensures a fun and worry-free crafting experience.
Can these crafts be gifts or keepsakes?
Definitely! Elegant options like framed watercolor crosses, sparkling wire bead crosses, or charming ornaments make unique and heartfelt gifts. Honestly, each piece is handcrafted and truly personal, making it a cherished keepsake for years to come.
How long do these crafts take?
It varies depending on the project. Simple tissue or coffee filter crosses can be completed in 15–30 minutes, while layered, painted, or beaded designs may take an hour or more. Honestly, taking your time ensures a stunning, vibrant result.

I’m father joaquin perez, we are a catholic church with all the sacraments where everybody is welcome. we celebrate catholic mass every Sunday at 12:30pm at saint stephen episcopal church at 2750 McFarlane road, Miami, Florida